As presented in this article, you can now configure BLEND to assign different colours to different consumption levels. This can be very useful since it makes it possible for you to get alerted of any abnormal consumption pattern just with your lighting system. But how does it work concretely and how to set up this function in your LifeSmart app?
We have written the following instructions to help getting started:
Open the LifeSmart app and click on the “Smart” icon on the bottom of the screen. Under the “Smart” tab, click then on the “+” sign next to “House Intelligence”. By doing so, you will reach the numerous automation template available in LifeSmart. Scroll down until you reach the “Energy indicator” tab and click on it.
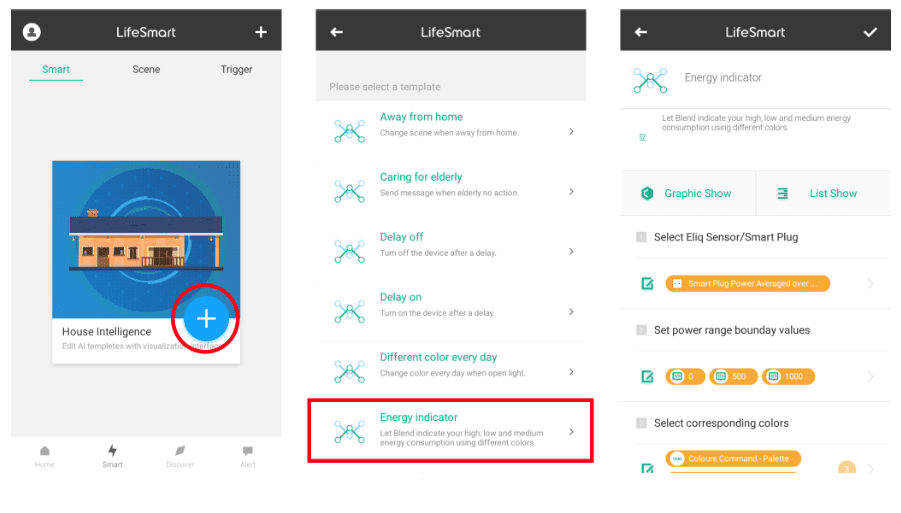
Once in this menu, click on the “Please select” sign under the first section “Select Eliq Sensor / Smart Plug” and choose the device whose consumption you want to measure. By selecting the Eliq Sensor, you can get indication of your overall energy consumption. On the other hand, with LifeSmart Smart Plug, you get the chance to control the usage of one single appliance such as your fridge or your heat pump.
-
The next step is to set the power range boundary values. After click on the tab under the corresponding title, by default,, you will be able to enter 3 different values :
-
The first value (top) should correspond to what your consider as low consumption
-
The second value (middle) should correspond to what your consider as medium consumption
-
The third value (bottom) should correspond to what your consider as high consumption
-
Note that these values should be entered in watt (W) and that you can add more boundary values by clicking on the “+” sign below.
-
Click then on the next tab to select the corresponding colors for each power level. The colour commands displayed follow the same order as the different levels you entered. Click on each of them to configure both the colour and action to trigger when reaching a certain power level. Note that you can add more colour commands by clicking on the “+” sign below.
-
Finally, select the one or several lighting devices you want to automate under the fourth section: “Select lights“.
-
To save those modifications, make sure to click on the check mark locate in the top right-hand corner of the screen.
Voilà ! Your lighting device(s) will now indicate the different levels of power consumption that you entered.